Why is Ozone Better?
Ozone Concepts #
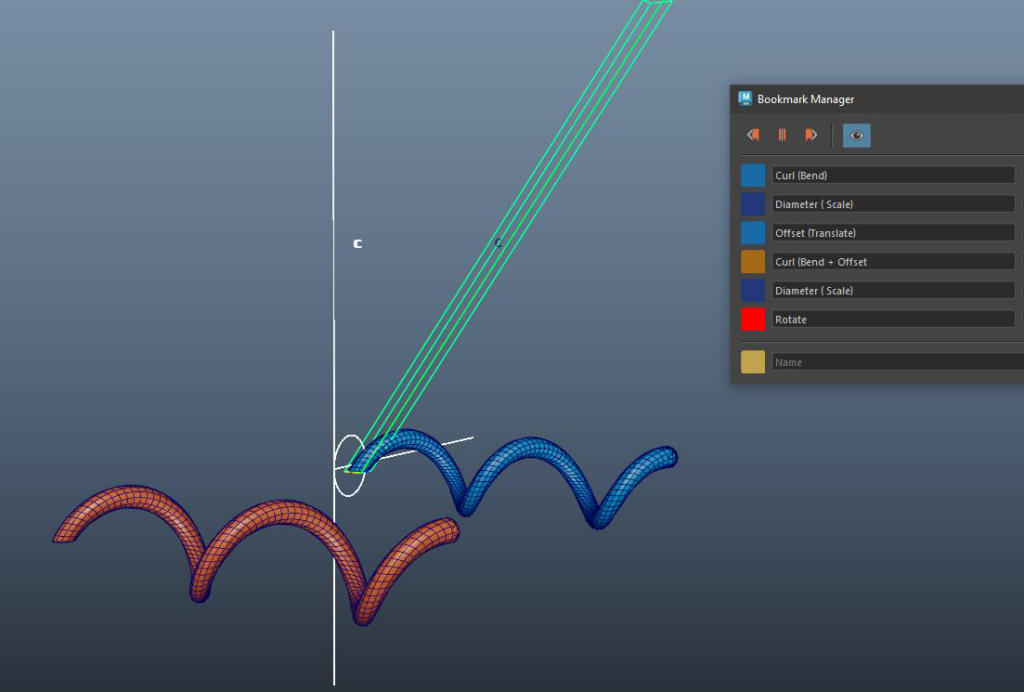
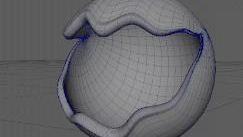
Ozone deformation tools and results at first glance are going to look and feel similar to other systems you might have used before, but lets explore deeper and see what makes it unique. The next section is to help you open your mind about what is possible as a starting point on your journey of learning to think of rigging and deformation problems in a whole new way.
Fitting #
In Ozone, using the Fitting tools inside of Maya allows you to adjust and tune how the Mesh is deformed by the by adjusting the starting positions, falloffs and transitions of the rig, by moving Locators and Curves.
An OZONE RIG usually a single Deformer node that contains everything needed for the final deformation, including transform locations as Matrix inputs (TRS) and other deformer types like projections and gradient falloff curve deformations.
To reach into the Deformer and adjust the location of where a deformation effect happens, adjust or fit an existing rig to your new mesh, you will use Fitting tools like, Pull and Push Rig fitting, Joint fitting that let you adjust and update the deformation live.
Hierarchy of Weights #
Ozone Weight Hierarchy #
OZONE deformation can have a weight hierarchy so that each deformation offsets the next. A simple way to think about this is allowing the deformer to take input like a skeleton hierarchy so you can achieve one to one deformation with a stack of joints or matrix inputs.
Maya Cluster Weight Hierarchy #
This can be thought of as a mix of the Maya deformation order + relative deformation on a series of Clusters, letting everything stack up to create resulting deformations and one can influence the next without causing double transformations.
While the concept and result are similar using Maya deformation tools, they quickly get complex and hard to manage vs. a single node that controls all of the effects.
Order of Operations #
Independent deformers within the layered, order of operations system, can be muted and reordered to give different final deformation results. These orders let you quickly change how the dormers get applied to change the effect of the deformation.

Independent Weights #
Each deformer can have it’s own weight map that is isolated allowing for complete control over each direction of movement without having to take away from another influence. This is additive deformation and not a subtractive balancing act that typical face rigging with joints requires, but offers non-linear interpolation for better results than typical blendShape based face rigs.
For example, the Jaw Up Down *UD can have isolated weights from the Left Lips Corner Front Back *FB
Animated Weights #
Artists can achieve complex deformations with fewer deformers by using weights that can be dynamically altered through animated or driven weight map curves.
Ozone Terminology Glossary #
📌 Ozone Language you will hear and need to know!
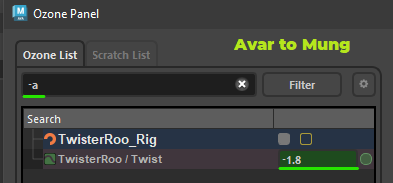
- Avar (Animation Variables): An Avar is usually channel that is designed for direct user interaction. Exposed in Maya as an Attribute that will show in the channelbox, can be edited and connected to and driven by animation or rig connections. You “Mung” an “Avar” when you want to see the rig do something.
- Dvar (Default Avar): A channel that can be set but NOT animated. Usually not exposed to Animation
- Mung: The user is actively changing a channel or avars value with the purpose of seeing a result in the rig.
- Actor (fileName.o3a/b): Container for a rigged asset that contains the mesh, the rig(s) and animation controls
General Rigging terms: #
- Character (Actor) Rig or “Asset” Rig: All of the master rigs required to define a complete characters/actors behavior for final output. Like complied code, they are ready to use anywhere Ozone runs like Maya, Unreal etc.
- Puppet Armature: Structure of the rig that is user facing that when manipulated provides direction to the deformation engine (Ozone) for final result of the rig. mGear is our Default Puppet Rig system but it can be any kind of driving connection into the Ozone deformer.
- Ozone Master Rig: A feature complete character with intentionally designed deformation and rigging throughout to used and reused across multiple assets/character meshes. These rigs are sharable between people/organizations and can be upgraded and versioned. A Master rig can be a collection of more than one component rig or other Master rigs designed to solve a specific problem.
- Utility/Component Rig: A reusable rig (think eye, ear, nose, arm, hand, fingers) designed to be part of a bigger system (usually a master rig) that will provide commonly required behavior saving artists time when building these larger systems. (may or may not include one or more deformers)
- Rig Component: A granular piece or ‘sub-rig’ of a larger rig system.
📌 Ozone Rigging and Weighting terms
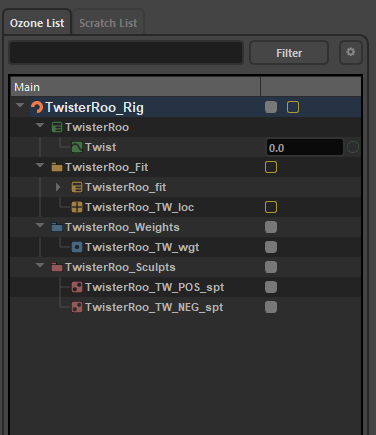
- Weight Container: A named reference to a weight map, a dynamic weight map, or an implicitly empty weight map. Designed to allow definition of weights flowing into master rigs without geometry present, to allow portable rig definition to be saved and reloaded into scenes, and to allow for complex weight relationship definitions.
- Weight Map: The direct definition of weight values on vertices.
- Falloff: Procedural gradient along a patch, curve or vector. Usually weights.
- Sculpt: An Ozone Sculpt, is a deformer like a “Maya blendShape/PSD corrective shape”. It moves points in space along vectors toward a sculpted position, with a ‘weight’ value as a multiplier. Usually used at add volume and more complex shaping to weighted rig elements. These are based on the deformation rig features and not always available.
Ozone UI #
Opening Ozone files .03(a/b) in Maya can be done directly through the File-Open or Import or Drag and Dropped into the Maya view.
There is a dedicated Actor manager as well that gives you more options and will be how you manage the existing Actor rig files, import more, attach geometry (skin it) to a rig in order to weight it and more*.
Ozone Actors #
The .o3(a/b) files are Actors and are a container for a rigged asset, as we learned from the glossary of Ozone terms. These Might or might not contain a mesh but they can while a rig is not a complete asset.
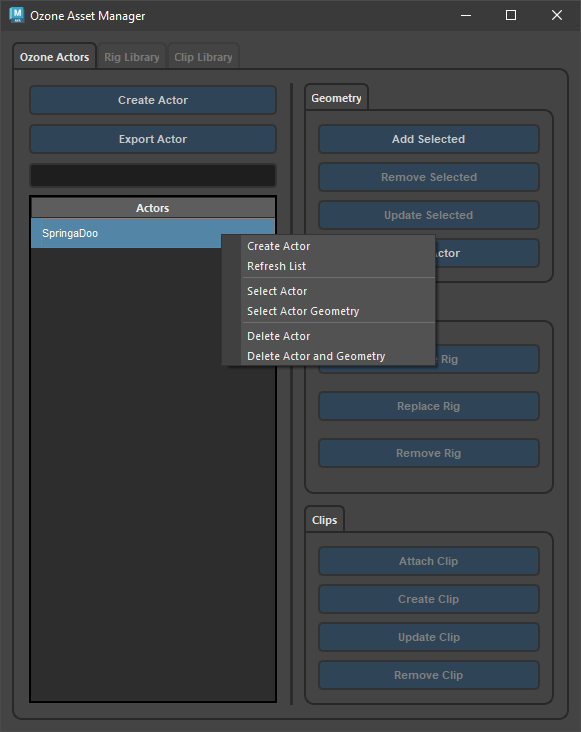
Create Actor
The main part of the Actors tab we will use is the Create Actor and the Geometry tab as well as the right click menu that is in the Actor list to manage removing, selecting and creating actors form the Rig Library.
Create Actor and Export Actor
Clicking the Create Actor button will bring up two choices
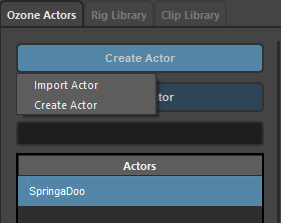
Create Actor: Create Actor
Brings up the Select a Rig selector to start with an existing rig in your library.
Note the “Add Selected Geometry to Actor” at the bottom of the window is on by default, so if you have your mesh selected it will import the rig and connect the mesh in one step, allowing you to start weighting.
⚠️If you don’t have the mesh select, it will give you a warning but you can then attach it in the

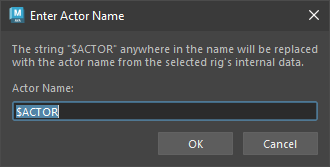
On the selection you will see a prompt window asking you to name the actor if you want, you can leave the default if you just want to import it in as is. If you want to change the name you need to do it here on import, it can’t currently be done from the UI afterwards.
Geometry-Add /Remove selected #
➕➖Once a rig is in the file you can add in more geometry or remove it from the existing rig.
♻️ Note that currently adding in a mesh and remove it is destructive and does not preserve the weights.
We have a merge and update external tool that can then push the old rig weights back into the new mesh if you are wanting to update or replace/reuse an existing rig
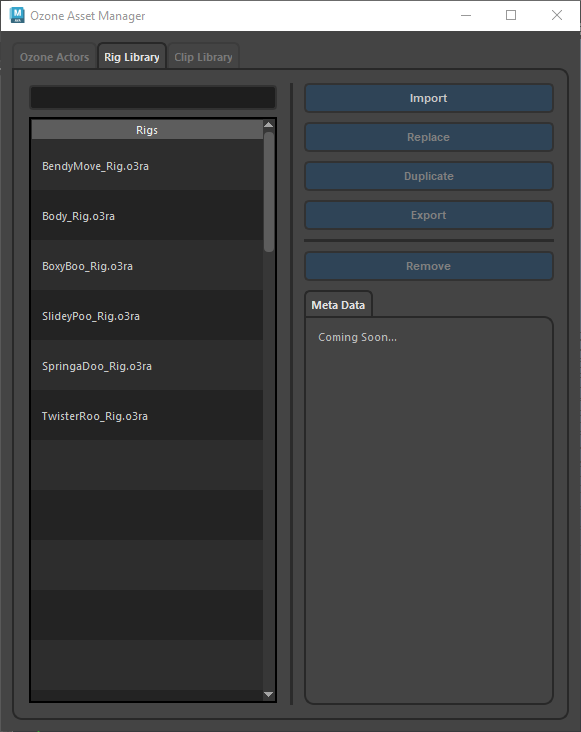
Ozone Rig Library #
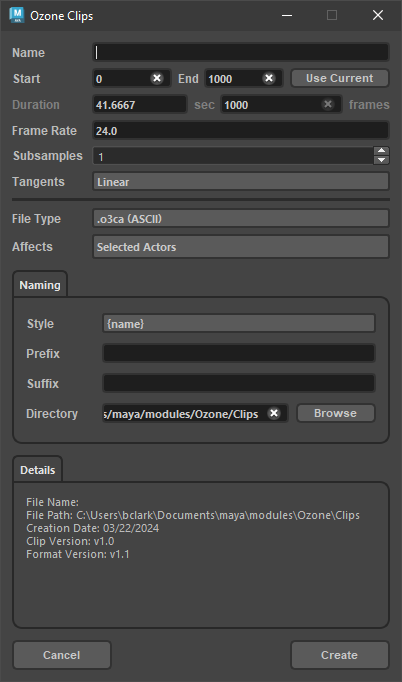
Ozone Clip Library #
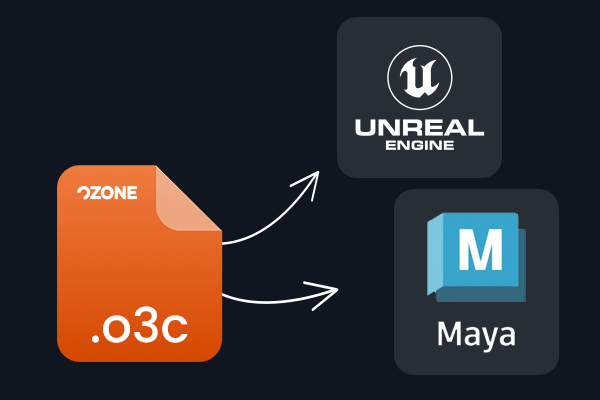
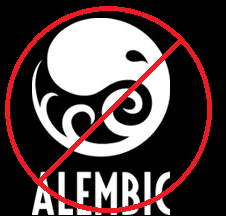
The Ozone clip format .o3c is an animation clip that will be created from and used with Ozone nodes as part of an Alembic replacement pipeline. While a .o3c clip can be loaded in to Maya you would most likely export the animation to Unreal. This lets you quickly update and republish only the animation without having to re-bake the entire cache or export a rig. Because the clip is isolated, the Deformations for the rig can be updated and sent to Unreal without having to re-cache everything.
The Clip Library in the Ozone Asset Manager has 2 main areas you will want to know.
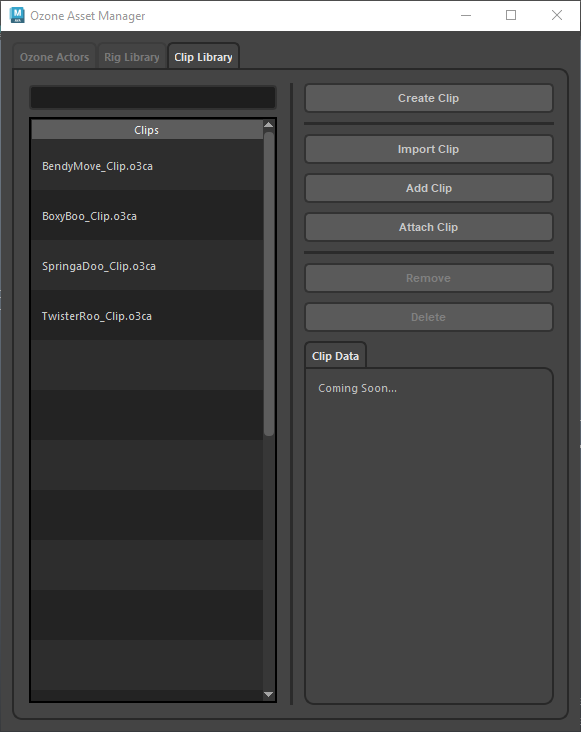
- Clips List
- Quickly see what clips you have in your external clip library folder and select them for the Add or Attach operations.
- Attach Clip You can also select any clip in the list and with Add Clip, import it to the Maya scene or use Attach Clip to both import and connect the selected clip the selected Ozone “actor”.
- *Add clip will let you import the selected clip into Maya, with nothing selected
- Create Clip
- This allows you to export the Ozone .o3c clip format and transfer animation in and out of Maya and Unreal. An exported clip will show up in your Clip Library.
Shortcut key and UI tips #
All lists:
- MMB: deselects everything
- RMB: opens popup menu
- Shift click: Expands all folders
Main and Search lists:
- alt+RMB: adds selected items to the Scratch list
Scratch list:
- alt+RMB: removes selected items to the Scratch list
- ctrl+RMB: clears the scratch list
Numeric Fields:
- MMB wheel moves values up or down by 0.05.
- Double-click: sets the field to either 0.0 or 1.0
Filter Field:
- Lots of reserved search functions to filter by type. All are available from the dropdown menu
- Typing ‘!’ before a string excludes matches to that string
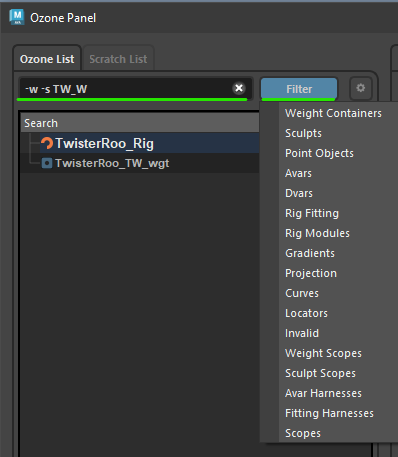
| Node Type | Flag |
| Avars | -a |
| Weights | -w |
| Sculpts | -s |
| Locators | -l |
| Curves | -c |
| Dvars | -d |
| Fitting Elements | -f |
| All Point Containers | -pts |
In the list rig errors will show up in yellow and if you hover over the text you will get a note about what is broken.
Invalidation usually means two things.
- No exec target. There’s no connection from the weight container to a deformer that uses those indices and weight values.
- No fit target. The object has no connection, or a bad connection, to object that can be ‘pulled’ and then manipulating in the Maya viewport.
This means that there was possibly an error in export or in the rig build in the master rig and will require an update.
Ozone Tools Panel #
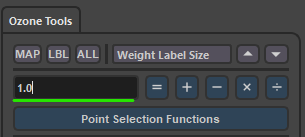
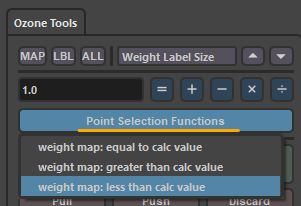
Point Selection Functions
Select points by weight quickly by using equal, greater or less than value set in the numeric input field
Here it is set to 1 so if we picked “weight map: equal to calc value” it would select all the points weighted at a value of 1.
Note: Remember that Ozone weights are not normalized so you can have it set to more than 1, we are just using that value as a default “max”
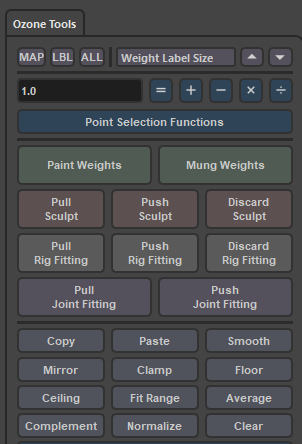
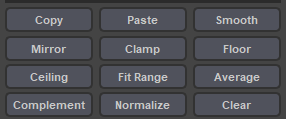
Weight Tools
Math operations let you adjust weight values of selected vertices. Remember that this will work with other “weights” like sculpts as well that have a map, not just weight containers.
Paint Weights calls the Maya artisan attribute brush to paint weights and smooth etc.
Mung Weights is an interactive tool to adjust weights within the 3d view, you can scrub/mung with the middle mouse button to increase or decrease weight values on the selected points.
The weighting tool functions allow weights and sculpt vectors (deltas) to be adjusted as well allowing you to quickly manage weights without the need to paint weights.
Sculpt Tools
These are for rigs that have sculpt ability and let you crate Ozone Pose Space Deformations *corrective blendShapes driven by Avars. These Sculpts also work with the animated weight values and you can use the weighting tools like smooth and mirror to help you adjust your sculpted shape after you Push it back into the deformer, with Push Sculpt.

Rig Fitting
These buttons are for pulling or exposing the locations of rig pivots or curves that influence the weighting. This is also how you can update the bind pose/deformation rest state of the Ozone Defomer if you have hooked up a new joint to drive say a “jiggle” or “bend/helper” joint into the deformer and want to place and move it without deforming the mesh.
Discard works just like sculpt mode, it is an “undo” or revert so you don’t change anything in the deformer. Sculpt vectors once pushed into the rig can be adjusted with the math operations and smooth

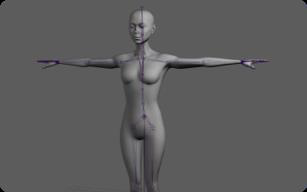
Joint Fitting
Joint Fitting is how you can adjust skeleton/joints that are connected into the Matrix type transform channels of an Ozone deformer. The equivalent of the Maya “Move Skinned Joints” tool that resets the bind relationship between the Joint translate and rotate and the deformation state. Example I want to move the location of a shoulder pivot, I can pull the joint fitting, adjust it and push it back to store it or keep it live to try out deformation changes live with animators feedback.

⚠️Note that the Root joint can’t be used as a selected Joint when doing the Joint Fitting Pull/Push
Connecting joints into the Ozone Deformer #
Node anatomy
Two Nodes #
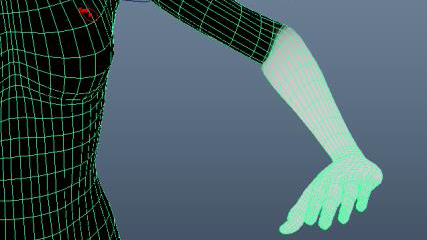
The Ozone deformer creates two nodes on the Mesh, Name.deform one to allow Maya to display and process the deformer at real-time speeds with Sub-d levels turned on and then the actual deformation Ozone node.
The Ozone node #
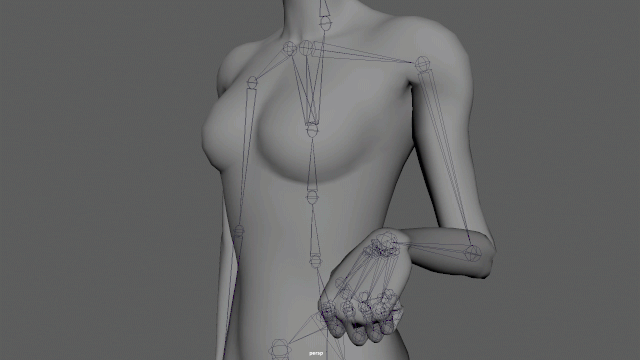
While many of the defomer AVARS show up in the channel box and the Ozone UI, ones that are matrix inputs like transform nodes in the rig that act like joints don’t, they show up in the Node editor in Maya and require a joint input to drive and see the changes on the mesh.
Use the world Matrix-output from the joint and connect it to the POS, ROT, SCL inputs.
Note transform matrix connections do not show up in the regular list of Avars in the Ozone Tools Window like other AVARS do.
Sometimes there is also a PARENT node that will need to be connected to the deformer to define what space to reference so you don’t get double transforms on your mesh. This won’t be for every matrix input (joint) but you search the node in the node editor to find the Parent inputs.

For best results your joint should be aimed along X axis (Default Maya Bone Orientation)
Just connecting into the driving target, the Spine in this case, is enough to create the deformation movement, we need to find the parent of the input and connect it so that we don’t get double transforms.
For example, the Parent of the Leg joints are the Hip_JNT so we feed that parent in to the PARENT POS, ROT, SCL for the Rt and Lt Leg Parent Ozone Deformer rig matrix input attributes.
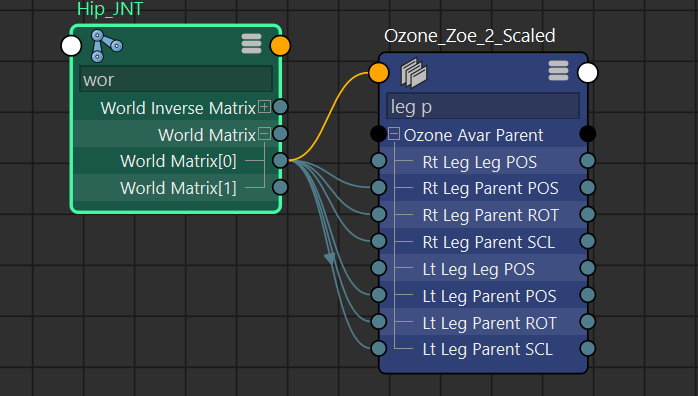
Connecting in Joint matrix connections can create an offset on the mesh. To correct you can pull the joint fitting and push it, to update the bind reference between the joint locations and the OZONE deform “bind” or rest pose.


